Checking the parallelism & squareness of twin machine tool rails

Checking parallelism/squareness of rails using autocollimator
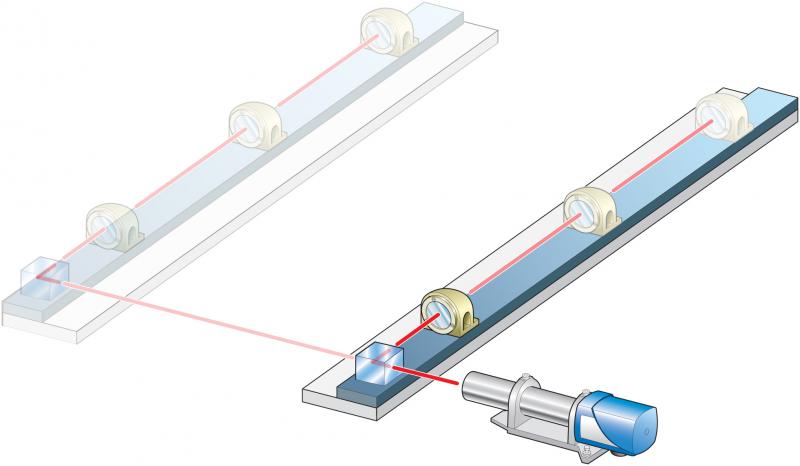
A common application in the machine tool industry is the need to check and set the parallelism and squareness of two machine tool rails. This can be achieved using an autocollimator with an optical square and mirror.
Firstly the autocollimator is positioned and set up with the optical square to measure the first rail. The autocollimator can be mounted on trivets, tripods or heavy duty stands and the reflector moved along the first rail - a series of straightness measurement can then be taken and the slope value calculated using the Taylor Hobson Optical Analysis software.
Leaving the autocollimator in the same position, the optical square and reflector are then moved to the second rail and the measurements repeated.
Note: it is imperative that the autocollimator is not moved from the first rail position as this is the refernce line. The out of squareness (parallelism) between the two rails is the difference in the individual slope values.
